Thursday, February 26, 2009

Virtual Tour Plan

Location

Activity

Content

Bunker Hill

MPH activity (Math)

Terrain

The Battle of Lexington and Concord

Journal Entry: if you were a minute-man would you go. (Literacy)

Pic

Battle of Saratoga

Go to this website: http://www.mrnussbaum.com/amflash.htm Go to this web site and click on the interactive battles. Look at battles that have come before and after this point. This is the turning point in the war. (History)

Video

Battle of Trenton

Go to this website: http://www.doublegv.com/ggv/battles/Trenton.html read the article. After you have read the article write a short story on what it was like to be a soldier that night. (Literacy)

Pic

Battle of Yorktown

Go to this website: http://library.thinkquest.org/10966/data/yorktn.shtml read the information and summarize your findings into 2 paragraphs. (Research, Literacy)

Image Overlay of Yorktown

Content:

Grade 5 Standard 2 objective 2a

Plot a time line of the key events of the Revolutionary War.

Pedagogy:

The lesson focus is mainly on observation and analysis of new information. As the students watch and participate in the tour of the major battle locations of the Revolutionary war they will come across lots of new information, students will be required to analyze what they are learning and apply it in various forms such as journal entries and short stories. These activities are a good way to get students to be actively engaged in the learning process; while some things will be directly taught the students will also be required to search out and discover some things on their own. As the students complete the tour and work on the activities at each site, they will also fill in their own timeline of the key events/battles that occurred during the war. This pedagogy works well with the content as the students will be working actively to learn about each of the battles and then they will be able to meet the core standard by creating their own timeline.

Technology:

We will be using Google Earth to create and present a tour of the locations of the main battles of the Revolutionary War. This technology works well for the lesson being taught as it allows the students to explore the different locations without having to actually go there. Students will be able to visualize what it is like at each of these locations as well as get an idea of where each battle location is in relation to the others. This also works well with the content as the battle locations will be visited in chronological order during the tour.

Friday, February 13, 2009

Digital Story

Monday, February 9, 2009

Storyboard

Storyboard: Witches in the Graveyard

Chelsea Hallam

Scene

Script

Title Page: Picture of witches with tombstones around.

Witches in the Graveyard Illustrated by: Chelsea Hallam

Witches sitting in the graveyard

Witches in the graveyard sat. Ooo ah ah

Two witches standing with a ruler going from side to side and top to bottom

Very short and very fat. Ooo ah ah

Corpses lying on stretchers being carried into the graveyard.

Saw three corpses carried in. Ooo ah ah

Two corpses standing with a ruler going side to side and one going top to bottom.

Very tall and very thin. Ooo ah ah

Witches and corpses near eachother in graveyard.

Witches to the corpses said, “Ooo ah ah”

Witches and corpses in the graveyard together, corpses speaking.

Corpses to the witches said, “ee ee ee”

Witches are frightened and run away

“Ahhh”

Credits: bats on background

Illustrator and Narrator: Chelsea Hallam


Content: 3rd grade Language Arts Standard 1 Objective 2: Developing language through viewing media and presenting. I chose to do a teacher centered project where the students would view the media but it could easily be altered so that the students were creating and presenting their own work.

Pedagogy: I chose to do a poetry interpretation, this is a good way to help students develop language. They are able to hear the poem, hear inflection, and see visual interpretations of what is being said.

Technology: This project will be using PhotoStory. This is a free program that allows you to create movies. This is a great resource as it can be used by both teachers and students. It would allow students to create their own project interpreting poetry or any other kind of text or subject material.

Monday, February 2, 2009

TPACK Analysis

Content: The content that this lesson focuses on is the moon and its phases (6th grade science standard 1: describing the changes in the appearance of the moon over a one month period). The students will observe the moon for one month to watch as it goes through each of the phases and they will make observations daily on its change.

Pedagogy: This lesson is inquiry based. The students will be both observing and analyzing data as they watch the moon and decide which phase it is in. This fits well with the content because students are able to actually look at the moon and describe what it looks like over one month.

Technology: The technology used in this lesson is Google Earth. I think this is a great tool to use as it allows the students to observe the actual appearance of the moon each day during class. The students don’t have to go outside at night, which may be impossible for some, it is a simple task that only takes a few minutes but allows the students to discover so much. This technology is great for the content and pedagogy. It allows students to meet the standard set out in the Utah state core and it allows them to do it on their own through observation, discovery.

The Tech Savvy Teacher

Welcome to the Tech Savvy Teacher! Technology is one of the best resources we have in the classroom, knowing how and when to use it is essential. This week in class we began working on the 6th grade science standard 1 objective 1 which entails describing the changes in the appearance of the moon during a month. To allow the students to observe these changes during school we will be using Google Earth. We will be able to observe the moon during each day of the 28-day cycle and measure the change each day.

Before beginning this project I first described the length of the cycle and introduced each of the phases of the moon (waxing crescent, 1st quarter, waxing gibbous, full, waning gibbous, last quarter, and waning crescent). Once students have a basic understanding of each of the phases it is time to use Google Earth. Students can complete this project either in groups or individually.  On the first day have the students open Google Earth select the planet icon to switch from earth to sky. Once they have selected “Sky” search for the Moon. 


Above: The beginning screen upon opening the program.
Below: Select the planet icon and search for the Moon.

To zoom in on the moon use the “+ and –“ bar on the right side of the screen. Each day of the cycle the students will observe the appearance of the moon and then use the ruler tool to measure how much of the moon is visible that day. To do this, select the ruler icon at the top of the screen, the screen should appear like the one below.


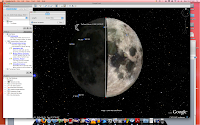
Above: Measuring the width of the moon.
Below: Measuring the moon from top to bottom.

The students will work on this project over one month to track the progress. The students will fill in a chart daily listing the date, the amount of the moon that is showing, a sketch, and the phase of the moon. Using Google Earth students will be able to use technology to observe the appearance of the moon during each of the phases without having to go outside each night. This program is a great way to get students involved in their own learning and excited about our solar system!